The Edimax Wireless nano USB Adapter is a common adapter and works well with Raspbian. However, it doesn’t work with the base install of Windows IoT Core. Here’s how to get it working.
First of all, this guide will assume you already have Windows IoT Core installed on your Raspberry Pi with the following prerequisites:
- Raspberry Pi 2 (may work on 3) with Windows IoT Core installed.
- An Edimax Wireless nano USB Adapter (Model EW-7811Un) connected to your Pi.
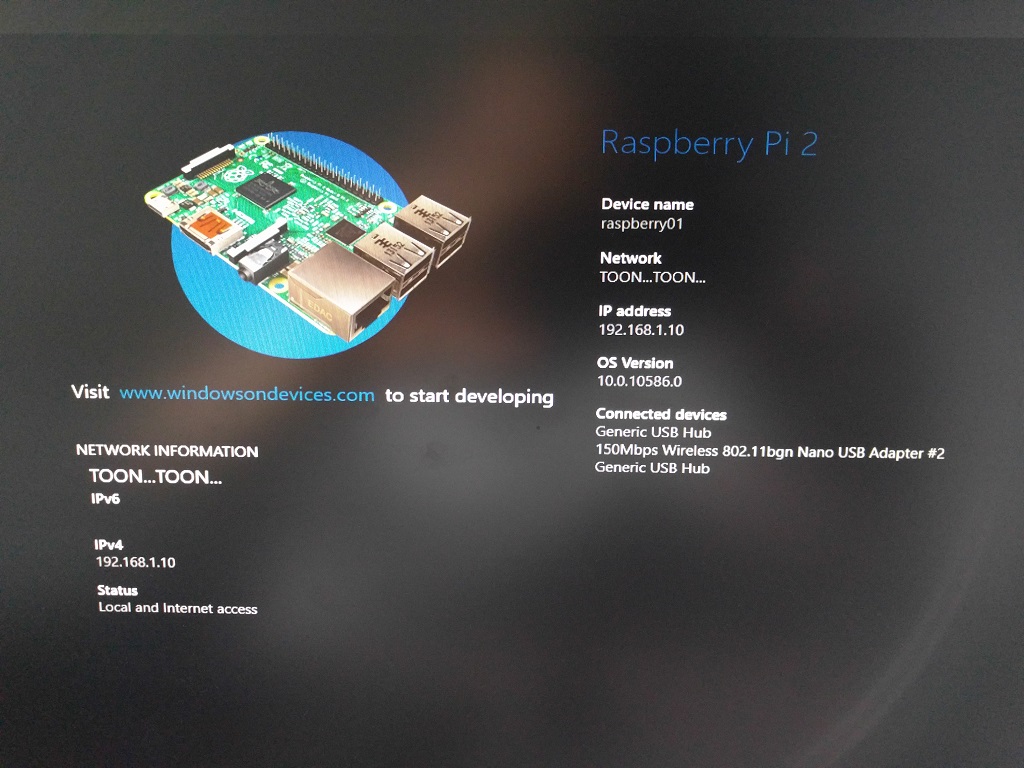
- Raspberry Pi is connected to your network (in this guide we will assume the IP address is 192.168.1.10 and the password is the default of
p@ssw0rd.
Windows IoT Core with Edimax nano USB Adapter
Step 1: Download the Edimax Driver
First of all we need to Download Raspberry Pi2 Win10 IoT v1.0.0.1 from the Edimax website.
Step 2: Copy the driver to the Raspberry Pi
Open File Explorer and browse to your Raspberry Pi via UNC path (in the example below the Raspberry Pi is assigned the IP Address 192.168.1.10)
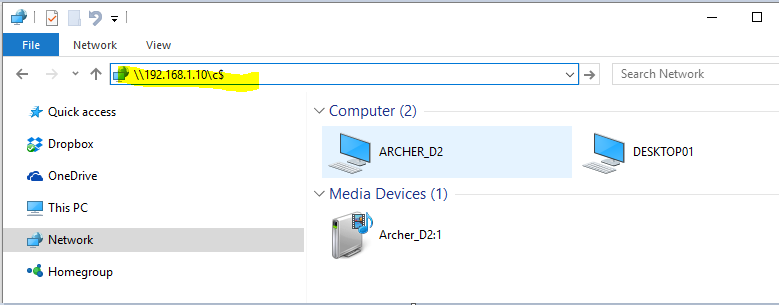
You may be asked to enter your username and password which by default are:
- Username: administrator
- Password: p@ssw0rd
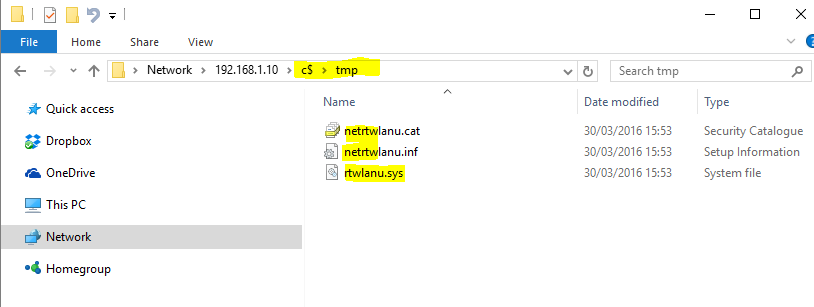
Create a new folder called tmp and copy the contents of the downloaded zip file into it.
Step 3: Install the Edimax Driver
Now that the files are copied to the Raspberry Pi, we will need to install the driver using Windows PowerShell.
Launch Windows PowerShell with elevated privileges (Right click Run as Administrator).
Start Windows Remote Management with the following command.
net start WinRM
Add your Raspberry Pi to trusted hosts.
Set-Item WSMan:\localhost\Client\TrustedHosts -Value 192.168.1.10
Say yes by pressing Y
Connect to the Raspberry Pi with the command.
Enter-PsSession -ComputerName 192.168.1.10 -Credential Administrator
You will be asked to enter the administrator password which by default is p@ssw0rd.
Enter the password to connect to the device. You should see the IP Address in square brackets at the beginning of the command prompt. This indicates you are connected to the device.
Run the following command to install the driver.
devcon.exe install C:\tmp\netrtwlanu.inf "USB\VID_7392&PID_7811"
The output should say “Drivers installed successfully.”
Reboot the device by running the following command.
shutdown /r /t 5
Once the device has restarted you can configure the Wireless network.
Step 4: Connect the Raspberry Pi to your Wireless Network
Connect to the Windows IoT Core web management console using a web browser and the IP address of your Raspberry Pi followed by port 8080.
For example: http://192.168.1.10:8080
Enter your username and password and then click on the Networking menu link.
Select the WiFi adapter and then click on the Wireless network you want to connect to. See the image below for details.
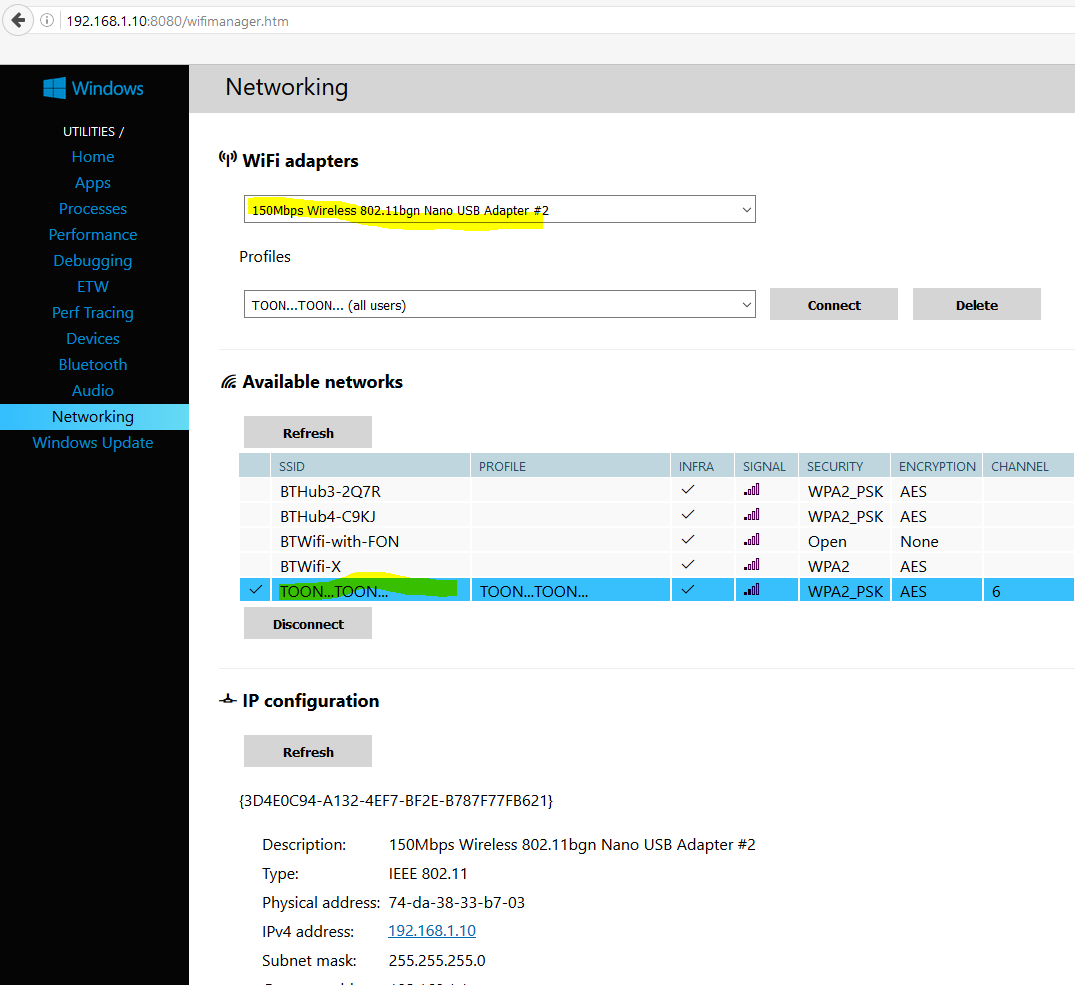
Once you are connected to the Wireless network you can click refresh to see what the new IP address is. You can then disconnect the ethernet cable and connect to the Raspberry Pi using the Wireless network in future.
Tip: If you want to give the Raspberry Pi a fixed IP address, you can do it by assigning the MAC address to a fixed IP in your router. Most routers have this feature.
Now when you reboot the Raspberry Pi you should automatically be connected to your wireless network.